Settings
The Settings tab contains advanced controls for Tone Mapping, White Balance, Camera Lens Types, Custom MDL Paths, and Environment Lighting. This menu also provides controls for customizing hardware resources. These options can be found in the Render Setup > Settings tab.
Tone Mapper
The tone mapper allows various controls over the appearance of your scene. These can be used during rendering, without interrupting progress. These can be found in Render Setup > Settings tab, under the Tone Mapper rollout:
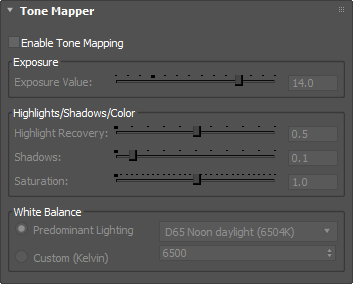
- Enable Tone Mapping: make interactive visual adjustments to the Iray rendering output.
- Exposure Value: control the overall exposure of your scene: positive values underexpose, negative values overexpose.
- Highlight Recovery: control the compression of highlights in the image. The higher the value, the more the highlights will be compressed. Setting a value of 0.0 means no compression.
- Shadows: control the strength of shadows. The higher the value, the darker the shadows. Setting a value of 0.0 leave the shadows unaltered.
- Saturation: control the strength of color. A higher value gives more intense colors, a lower value gives paler colors.
- White Balance:
- Predominant Lighting: select the color temperature from a dropdown menu of preset lighting types, each with the corresponding Kelvin value:
- Full Spectrum
- D50 (Horizon light) 5003k
- D55 (Mid-morning/afternoon daylight) 5503k
- D65 (Noon daylight) 6504k
- D75 (North sky daylight) 7504k
- F1 (Daylight fluorescent) 6430k
- F2 (Cool white fluorescent) 4230k
- F3 (White fluorescent) 3450k
- F4 (Warm white fluorescent) 2940k
- F5 (Daylight fluorescent) 6350k
- F6 (Light white fluorescent) 4150k
- A (Incandescent/Tungsten) 2856k
- Phosphor Mercury 6800k
- Xenon 6400k
- Mercury 4000k
- Quartz 3350k
- Halogen 3000k
- High pressure sodium 2200k
- Custom (Kelvin): specify the color temperature directly via the Kelvin value of the light.
Environment Lighting
The Active Environment dropdown provides information on which environment is currently lighting the scene. Iray only allows one active environment at a time.

- None: Iray will not use any environment in your scene.
- Select: will select this environment in 3ds Max, allowing you quicker access to transform or edit its parameters.
Camera
The camera rollout provides settings for traditional cameras (Planar), 360 degree panoramic cameras (Spherical), and other panoramic cameras (Cylindrical). When enabled, there are additional output controls for left and right eye stereo rendering. Default settings having no effect on the Iray rendering output.
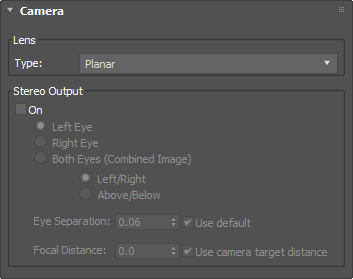
Lens Type: select the lens type:
- Planar: select this (default) lens type to make the rendering unchanged from previous versions of Iray.
- Spherical: select this lens type to capture 180 degrees vertically (zenith to nadir) and a full 360 degrees horizontally, ignoring the viewport camera Field of View (FOV) settings. The resulting image is a latitude/longitude spherical rendering.
✱ Note: This can be used to create spherical environments for Image Based Lighting (IBL). For best results, try rendering square pixels at a 2:1 ratio (e.g. 1024 x 512, 4096 x 2048, etc.).
- Cylindrical: select this lens type to create a cylindrical panoramic image. It uses the vertical FOV of the viewport camera while the horizontal FOV becomes a full 360 degrees. This is similar to photographing and seamlessly stitching together a series of consecutive images while rotating the camera horizontally around its panoramic pivot point.
✱ Note: For best results with Spherical and Cylindrical lens types, use a camera parallel to the ground, with no pitch or roll.
Stereo Output:
- On: toggle Stereo Output on or off.
- Left Eye: select Left Eye to render with stereo offset based on Eye Separation and Focal Distance.
- Right Eye: select Right Eye to render with stereo offset based on Eye Separation and Focal Distance.
- Both Eyes (Combined Image): select to render both Left Eye and Right Eye with stereo offset based on Eye Separation and Focal Distance.
- Left/Right: select to render both eyes simultaneously, side by side.
- Above/Below: select to render both eyes simultaneously, above and below.
✱ Note: When using Both Eyes (Combined Image), it is necessary to set the entire 3ds Max Output Size. For best results when setting up for Virtual eality (VR)-ready output, use Above/Below, and try rendering square pixels at a 1:1 ratio (e.g. 1024 x 1024, 4096 x 4096, etc.).
- Eye Separation: set the distance between the left and right eyes. Also known as inter-axial separation, this defaults to 6 cm (2.362 inches). Disable the Use Default checkbox to modify this value.
✱ Note: The Eye Separation value has an effect on the perception of stereo depth. Larger values increase stereo parallax, and make the scene scale feel smaller and the stereo effect more noticeable. Conversely, smaller Eye Separation values make the perceived scene scale larger and the stereo effect more subtle. VR device manufacturers may specify the recommended Eye Separation distance.
- Focal Distance: set the distance at which the stereo effect has zero parallax. Objects closer than this distance have positive parallax and appear to be projecting out of the screen. Objects beyond this distance have negative parallax and appear to recede into the screen. Disable the option “Use camera target distance” to modify this value.
- Use camera target distance: enabled by default. When enabled, Focal Distance will be the Target Distance of the viewport camera.
Filters
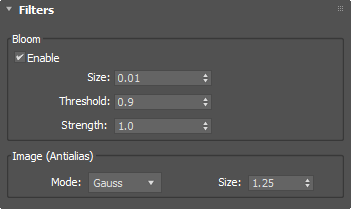
Bloom: use this post-process filter to approximate bloom/glare effects. This can be used to produce subtle enhancements, such as adding slight halos to emissive objects.
Image (Antialias): use this filter to smooth out the effects of aliasing, to help reduce the appearance of jagged lines in the image.
- Mode: select between three different smoothing filter shapes:
- Size: specify the size of the filter in pixels. A large value will reduce aliasing further but may lead to unsharp images. The minimum setting is 0.5.
Frame Buffer
The Iray+ Frame Buffer can be used to display ActiveShade or Production renders instead of the default 3ds Max frame buffer. See Iray+ Frame Buffer for more details.
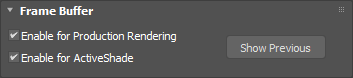
- Enable for Production Rendering: enable the Frame Buffer for Production renders.
- Enable for ActiveShade: enable the Frame Buffer for ActiveShade renders.
- Show Previous: open the Frame Buffer to display or save the previous render results, including render elements and LPE layers.
Network Render
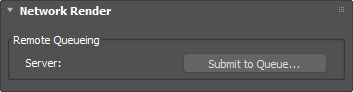
Access the Network Render dialog for remote offline rendering. See Remote Rendering for more details.
Resources
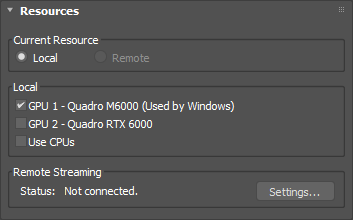
Gives options over local and remote rendering. See Remote Rendering for more details.
Materials
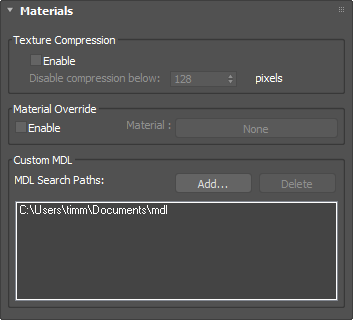
- Texture Compression: enable to adjust the texture resolution for optimization at render time. Disable compression below a user–defined pixel amount to limit the optimization for smaller textures.
- Material Override: enable to replace all materials in your scene with a single material. This is ideal for creating 'clay' renders.
- Custom MDL: specify additional paths to custom MDL materials. See Using MDL for more details.
▲
Page Last Edited:
