
Documentation
Documentation
The Iray+ Frame Buffer offers additional flexibility and functionality to the default 3ds Max frame buffer. It can be used in both ActiveShade Mode and Production Rendering Mode.
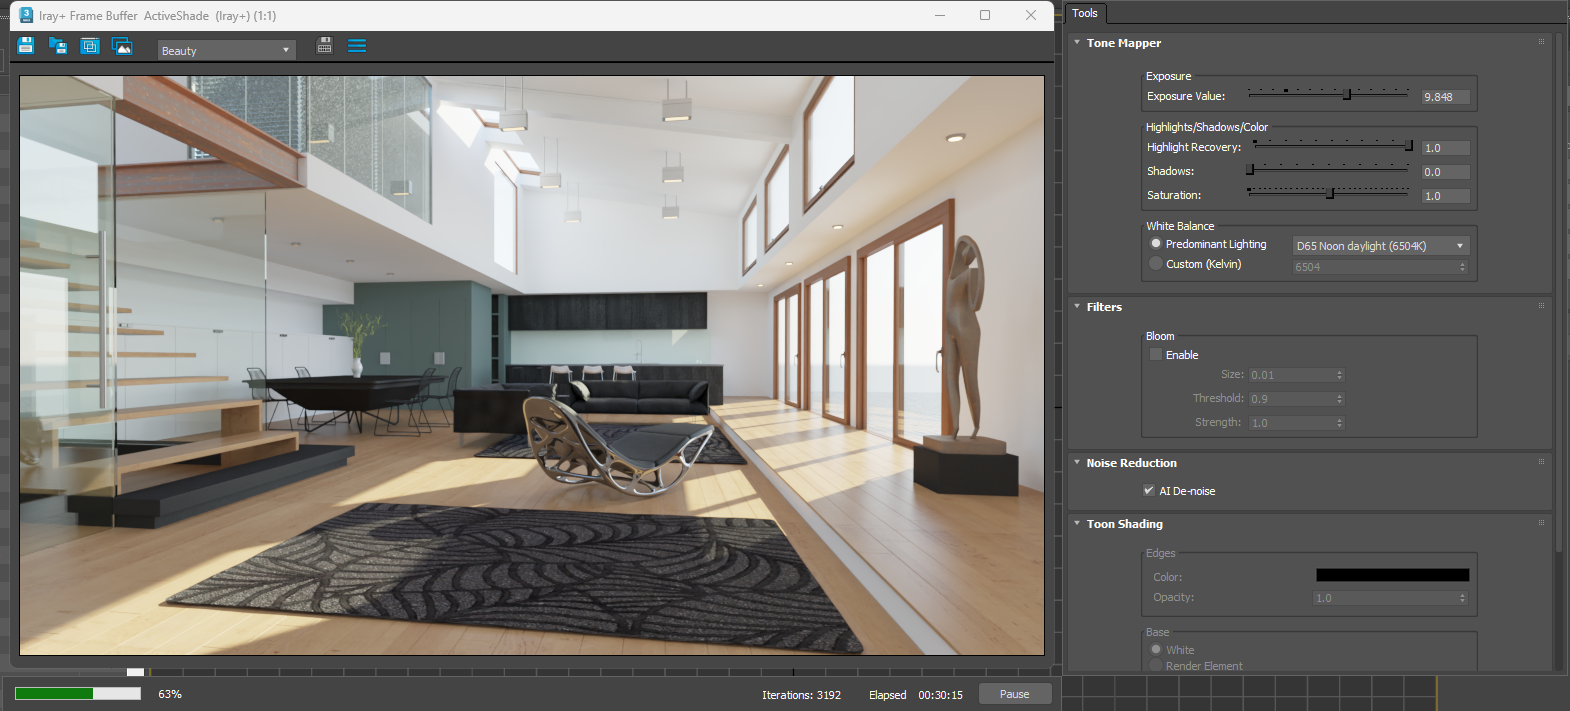
With the Iray+ Frame Buffer you can preview and switch between Render Elements and Light Path Expression layers using the dropdown control. The layers must be enabled on the Render Elements tab to be selectable. Once selected, you can switch between them whilst rendering and save out individual layers as you see fit (also in raw form where appropriate). You can also clone the Iray+ Frame Buffer window to display multiple layers simultaneously.
The pop-out Tools menu allows quick access to the Tone Mapper, Bloom filter, AI De-noise filter, and Toon Shading controls, as well as relevant controls when performing Lighting Analysis. All the controls available on the Tools menu can be used during rendering without causing the render to restart.
You can enable the Iray+ Frame Buffer from the Settings tab for either Production Rendering Mode, ActiveShade Mode, or both. When selected, start a render as normal and it will be displayed in the Iray+ Frame Buffer instead of the 3ds Max default buffer.
You can also open the Iray+ Frame Buffer window at any time to view or save any previous render results, including render elements and LPE layers.
| Icon | Detail |
|---|---|
| Save Currently Displayed Layer | |
| Save All Layers | |
| Clone Iray+ Frame Buffer Window | |
| Copy Image (to clipboard) | |
| Save Current Layer Raw Data (if applicable) | |
| Save Lighting Analysis Data (if applicable) | |
| Toggle Tools Menu |
Last edited: