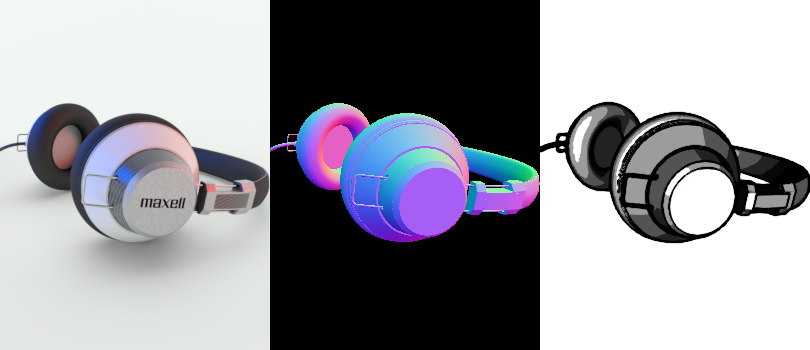
Render Elements in Iray for 3ds Max: Beauty, Normal, Toon
As well as the main render (also known as the Beauty layer), Iray for 3ds Max can generate
additional Render Elements to capture subsets of the lighting interactions, or to show additional
information about the scene. These extra layers are available in Production Rendering Mode and can also be displayed in
ActiveShade Mode when using the Iray+ Frame Buffer.
Render Elements are useful for post-processing and compositing without the need to re-render scenes. They can be found on
the Rendering > Render Setup… > Render Elements tab:
In Production Rendering Mode, Render Elements are stored alongside your rendered image in the directory set via
Render Setup… > Common > Common Parameters > Render Output. They use the name that you
specify in Render Output, with the suffix of the element name (for example, Myfile01 - Alpha.png).
You can also save out Render Elements directly from the Iray+ Frame Buffer.
See Light Path Expressions if you require more
flexibility when creating such extra elements (for example, a purely specular layer).
✱ Note: Render Elements are not yet supported by
Remote Rendering.
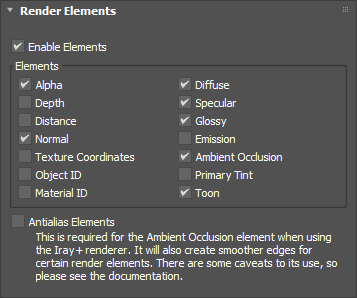
Render Elements
Use the controls on the Render Elements rollout to specify and configure the behavior of Render Elements:
Enable Elements: toggles the creation of Render Elements on or off.
Various Elements are available as standard:
Alpha: renders a grayscale representation of transparency in the scene. The darker the pixel,
the more transparent it is: Black = transparent, White = opaque.
Depth: renders a grayscale representation of depth in the scene. Depth is measured as the perpendicular
distance from the focal plane of the camera. The closer the object to the camera, the whiter the object appears.
Useful for adding depth of field in post-processing.
Distance: similar to Depth, except that distance is measured radially from the camera's
XYZ position.
Normal: renders a false color representation of shading normals in the scene.
Texture Coordinates: renders a false color representation of texture coordinates in the scene.
Object ID: assigns each object a separate color. Useful for selecting individual objects in post-processing.
Material ID: assigns each material a separate color. Useful for selecting objects with the same
material in post-processing.
Diffuse: renders only diffuse reflections in the scene.
Specular: renders only specular reflections in the scene.
Glossy: renders only glossy reflections in the scene.
Emission: renders only emissive light sources in the scene.
Ambient Occlusion: renders a grayscale image that uses ambient occlusion for shading.
Primary Tint: renders the main (dominant) color tint of each material in the scene.
Toon: renders cartoon shading effects generated by post-processing.
✱ Note: both the Depth and Distance
Elements have finite resolution. If using the infinite Ground plane
(Iray+ Physical Sky or
IBL) then the available resolution of the depth values
will be spread over the whole ground plane and so may not give the required results for the main model
geometry. Unless viewing a finite portion of the ground plane, it may be preferable to remove it when
rendering Depth and/or Distance layers.
✱ Note: Render Elements are not available when using the
Lighting Analysis
feature to perform Illuminance rendering.
Antialias Elements: improves (by smoothing) the appearance of edges for Depth,
Distance, Normal, Texture Coordinates, Object ID, and
Material ID Elements. Additionally, it is required for the Ambient Occlusion Element
to be rendered correctly.
The following caveats apply when Antialias Elements is enabled:
For scenes where the Backplate or Environment is visible, Depth and Distance Elements
will have incorrect grayscale scaling and the Normal Element may show artefacts around edges;
Blended color values in the Normal, Texture Coordinates,Object ID,
and Material ID Elements are not strictly meaningful and may not be desired.
Toon Shading is a post-processing technique to render non-photorealistic images similar in style to traditional 2D
animated cartoons, with highlighted edges and false shading effects.
✱ Note: to enable Toon Shading, ensure that both the Enable Elements
and Toon checkboxes are ticked on the Render Elements rollout.
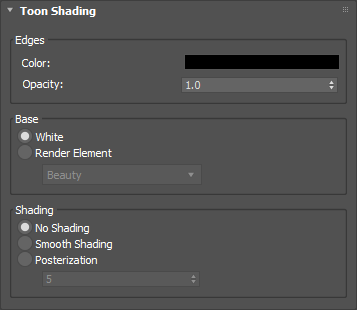
Use the controls on the Toon Shading rollout to specify the appearance of Toon Shading:
Edges: controls the appearance of outline edges in Toon Shading:
Color: use the Scene Color Selector to specify the outline edge color.
Opacity: set the outline edge opacity between 0.0 (transparent) and 1.0 (opaque).
Base: specifies the source image to be used in Toon Shading:
White: render the outline edges on a plain white canvas.
Render Element: select a Render Element to serve as the source for Toon Shading. To appear in the
dropdown, the selected element must be enabled on the Render Elements rollout. By default,
the Beauty layer is used. Other supported elements include Ambient Occlusion,
Primary Tint, and standard illumination elements.
Shading: when Base is White or set to either the
Ambient Occlusion or Primary Tint Render Element,
Toon Shading can apply a false shading effect to the input layer:
No Shading: do not apply a false shading effect.
Smooth Shading: apply a smooth false shading effect, based on surface normal orientation.
Posterization: quantize the false shading effect. The chosen value determines the number of discrete
illumination bands to apply.
Ambient Occlusion
Ambient Occlusion (AO) simulates the way in which the free circulation of light is impeded by the proximity of neighboring
surfaces. This technique produces grayscale images that exhibit subtle shadowing in areas close to one another.
✱ Note: to see the AO effect, ensure that the Enable Elements,
Ambient Occlusion, and Antialias Elements checkboxes are ticked on the
Render Elements rollout.
Use the controls on the Ambient Occlusion rollout to modify the AO effect if necessary – in most cases, the default
settings will give good results.
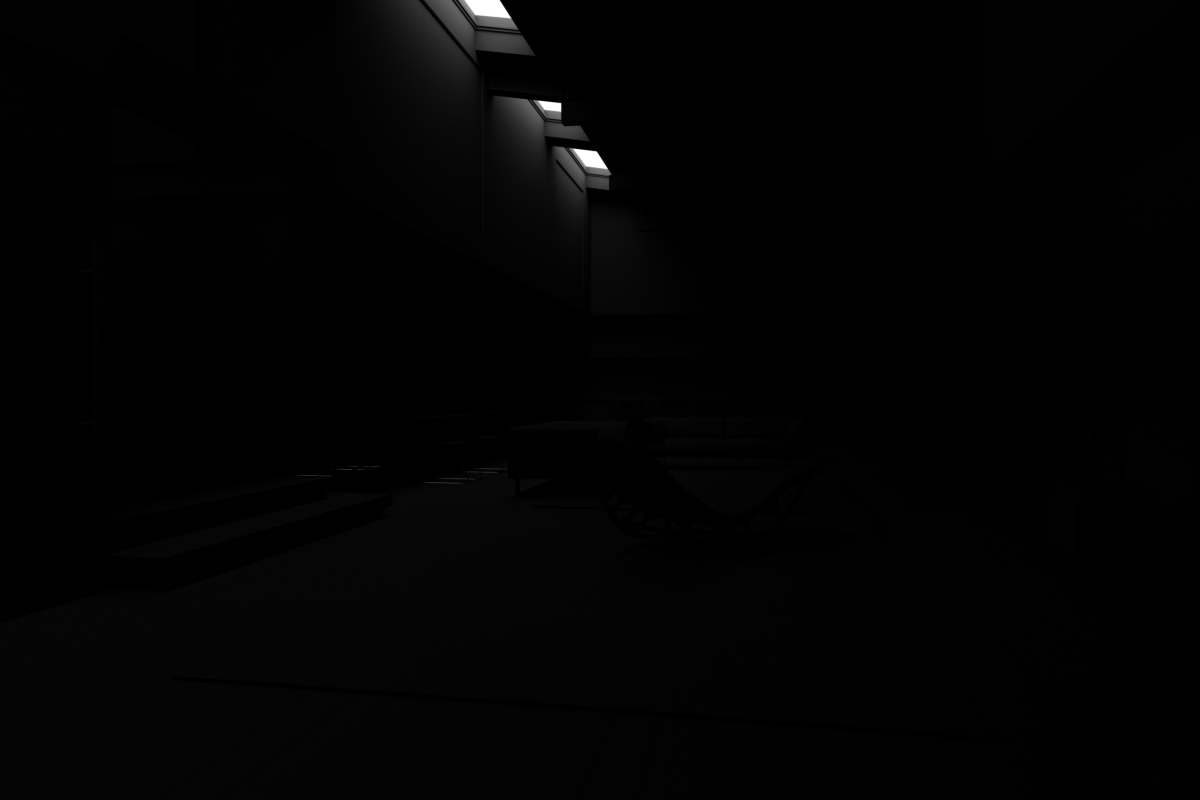
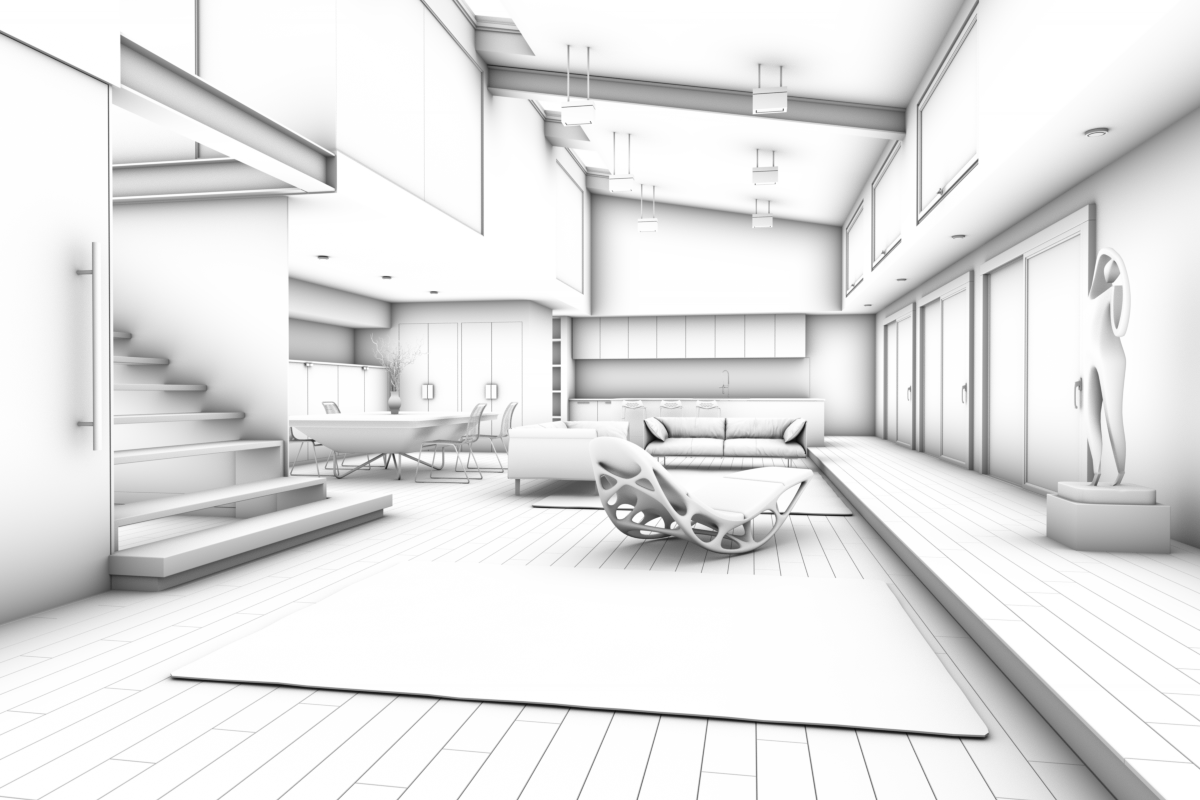
Occlusion Range: controls the distance at which objects in the scene are considered to occlude other
objects. In many cases, the default Unlimited setting should give acceptable results. In some cases,
however, it may prove beneficial to restrict the range of occlusion. For example, in an interior scene we recommend that
you adjust the Occlusion Range to ensure that boundaries (floors, walls, etc.) do not occlude interior objects:
Unlimited: allows geometry at any distance to occlude other geometry. This option works for most
non-enclosed scenes.
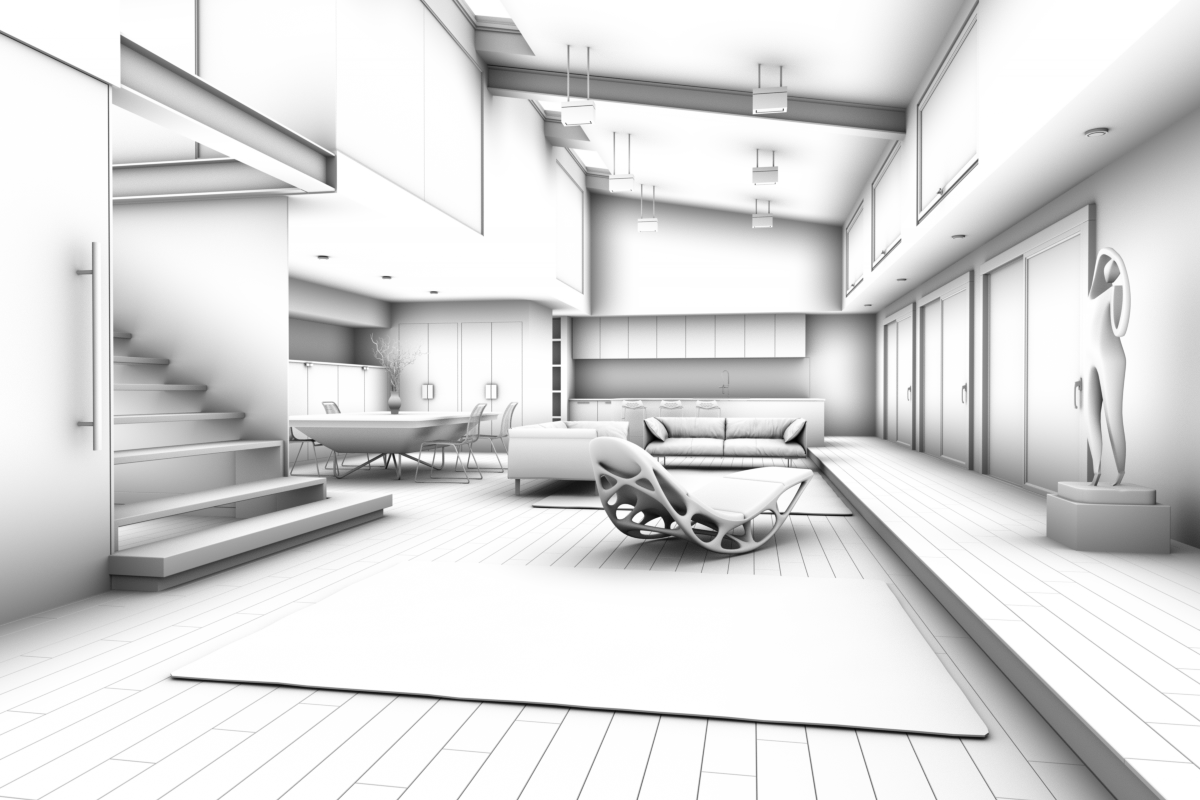
Maximum: defines the maximum distance at which surfaces may be considered to occlude one another.
Within an enclosed space such as a room, we recommend that you set this distance to be considerably less than the
overall dimensions of the room.
Occlusion Range: Unlimited
Occlusion Range: 1.0m
Strength: controls the intensity of the AO effect. Higher values will result in darker shadowing.